Deploy a LaunchDarkly Server, Locally!
Deploy a LaunchDarkly Server, Locally!
Ever found yourself wanting to test feature flags locally without signing up for a LaunchDarkly account or dealing with cloud dependencies? Maybe you're building a microservice that needs feature flags, or you just want to experiment with LaunchDarkly's SDK without the overhead of a full production setup.
Well, I've got you covered.
Before we dive in, let me say that LaunchDarkly offers way more than just feature flags—they've got experimentation, targeting rules, and a whole suite of tools worth checking out at launchdarkly.com. But let's be real: most of us just need a simple feature flag system for local development. That's exactly what we're building today.
What We're Building
We'll be spinning up a local LaunchDarkly development server using Docker. This approach gives you a fully functional feature flag system running on your machine, perfect for development and testing. While I'm using Docker here, you could just as easily deploy this to Kubernetes or run it directly on your local machine.
Understanding the LaunchDarkly Dev Server
The LaunchDarkly CLI includes a handy dev server that you can start with ldcli dev-server start. Under the hood, it uses a SQLite database stored at /root/.local/state/ldcli/dev_server.db to manage your projects, flags, and configurations.
The beauty of this setup is that it's completely self-contained—no external dependencies, no cloud connections, just a simple database and a server.
Setting Up the Database
Before we can start the server, we need to set up the database schema. LaunchDarkly expects three main tables: projects, overrides, and available_variations. Let's create a file called db/base.sql with the following content:
PRAGMA foreign_keys=OFF;
BEGIN TRANSACTION;

DROP TABLE IF EXISTS available_variations;
DROP TABLE IF EXISTS overrides;
DROP TABLE IF EXISTS projects;

CREATE TABLE IF NOT EXISTS projects (
  key text PRIMARY KEY,
  source_environment_key text NOT NULL,
  context text NOT NULL,
  last_sync_time timestamp NOT NULL,
  flag_state text NOT NULL
);

CREATE TABLE IF NOT EXISTS overrides (
  project_key text NOT NULL,
  flag_key text NOT NULL,
  value text NOT NULL,
  active boolean NOT NULL default TRUE,
  version integer NOT NULL default 1,
  UNIQUE (project_key, flag_key) ON CONFLICT REPLACE
);

CREATE TABLE IF NOT EXISTS available_variations (
  project_key text NOT NULL,
  flag_key text NOT NULL,
  id text NOT NULL,
  value text NOT NULL,
  description text,
  name text,
  FOREIGN KEY (project_key) REFERENCES projects (key) on DELETE CASCADE
  UNIQUE (project_key, flag_key) ON CONFLICT REPLACE
);

COMMIT;
Populating with Sample Data
Now that we have our schema, let's add some sample data. We'll create a project with three different types of flags: boolean, string, and number. Create a file at db/projects/project-1.sql:
PRAGMA foreign_keys=OFF;
BEGIN TRANSACTION;

INSERT INTO projects VALUES (
  'project-1',
  'example',
  '{"kind":"user","key":"example-environment"}',
  CURRENT_TIMESTAMP,
  '{
    "1_boolean_flag":{"value":true,"version":1},
    "1_string_flag":{"value":"127.0.0.1","version":1},
    "1_number_flag":{"value":10,"version":1}
  }'
);

COMMIT;
Docker Compose Configuration
Now for the fun part—let's containerize this! We'll use a pattern similar to Kubernetes init containers. First, we'll run a SQLite container to create and populate the database, then start the LaunchDarkly server with access to that database.
Here's the init container configuration:
services:
  init-db:
    image: alpine/sqlite:3.49.2
    entrypoint: /bin/sh
    command: >
      -c "cat /db/base.sql /db/projects/* |
      sqlite3 /db-out/dev_server.db"
    volumes:
      - ./ldcli/state:/db
      - ld-db:/db-out
  # ...
volumes:
  ld-db:
Now let's add the LaunchDarkly server itself:
  # ...

  launchdarkly:
    image: launchdarkly/ldcli:2.0.1
    depends_on:
      init-db:
        condition: service_completed_successfully
    ports:
      - 8765:8765
    environment:
      LD_ACCESS_TOKEN: NO_TOKEN
    command: dev-server start
    volumes:
      - ld-db:/root/.local/state/ldcli
Starting the Server
Fire it up with:
docker compose up -d
Once the containers are running, navigate to http://localhost:8765 in your browser. You should see the LaunchDarkly UI with your project and flags ready to go!
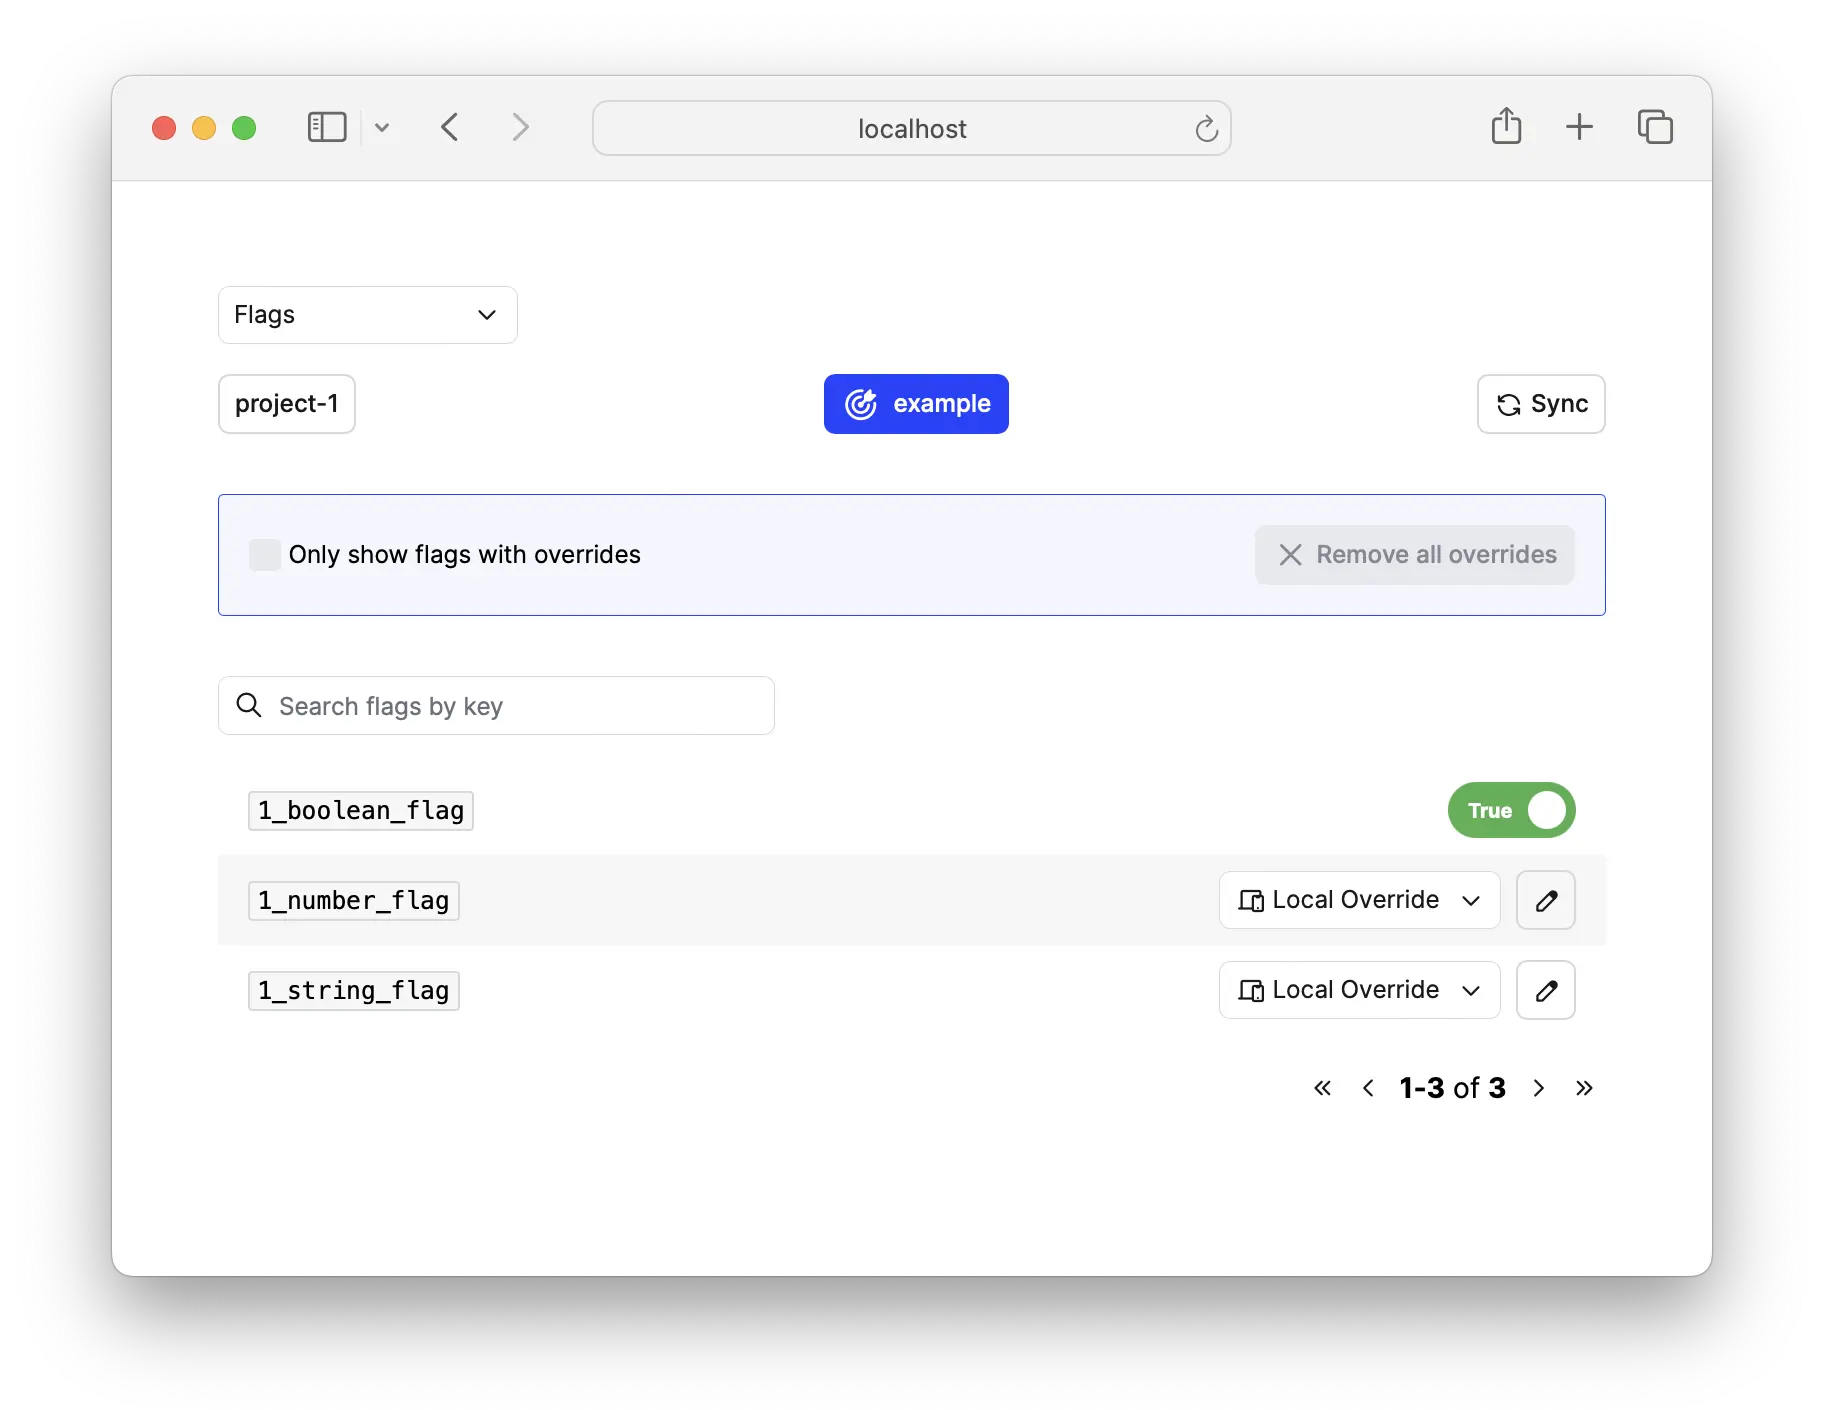
And that's it! You now have a fully functional LaunchDarkly server running locally. You can toggle flags, create new ones, and test your application's behavior—all without touching the cloud.
Connecting Your Application
Now that we have a server running, let's connect to it from a Node.js application. Here's an example using the LaunchDarkly Node SDK:
import LD from '@launchdarkly/node-server-sdk';

// This should match the context provided in the SQL files
const context = {
  kind: 'user',
  key: 'example-environment'
};

const ldOptions = {
  baseUri: 'http://localhost:8765',
  streamUri: 'http://localhost:8765',
  eventsUri: 'http://localhost:8765'
}

const project = 'project-1';
const ldClient = LD.init(project, ldOptions);

try {
  await ldClient.waitForInitialization({timeout: 5});

  const boolFlag = '1_boolean_flag';
  const stringFlag = '1_string_flag';
  const numFlag = '1_number_flag';

  const boolFlagValue = await ldClient.variation(boolFlag, context);
  const stringFlagValue = await ldClient.variation(stringFlag, context);
  const numFlagValue = await ldClient.variation(numFlag, context);

  // Boolean example
  console.log(`${boolFlag} flag key evaluates to "${boolFlagValue}".`);
  // String example
  console.log(`${stringFlag} flag key evaluates to "${stringFlagValue}".`);
  // Number example
  console.log(`${numFlag} flag key evaluates to "${numFlagValue}".`);

  // Gracefully close connection
  ldClient.close();
} catch(err) {
  // Client failed to initialize or timed out
  console.log(err);
}
A few things to note about this client code:
-
Context Matching: The
contextobject must match what you defined in your SQL files. This is how LaunchDarkly knows which flag values to return. -
Local URIs: We override the default URIs to point to our local server instead of LaunchDarkly's cloud service.
-
Project Key: The project key (
project-1) must match the key in your database. -
Initialization: Always wait for the client to initialize before evaluating flags. The timeout prevents your app from hanging if the server is unavailable.
What's Next?
You can extend this setup in several ways:
- Add more projects: Just create additional SQL files in
db/projects/ - Dynamic flag updates: Use the LaunchDarkly UI to toggle flags in real-time
- Multiple environments: Create different contexts for dev, staging, and testing
- Integration testing: Use this setup in your CI/CD pipeline for consistent feature flag testing
Wrapping Up
Running LaunchDarkly locally gives you a fast, reliable way to develop and test feature-flagged applications without external dependencies. It's perfect for:
- Local development when you're offline
- Integration tests that need consistent flag values
- Experimenting with LaunchDarkly's SDK before committing to the cloud service
- Microservices that need feature flags but don't require LaunchDarkly's full feature set
The complete code for this setup is available in the repository. Happy flagging! 🚀